GA4, short for Google Analytics 4, is a tool that helps website and app owners understand how people interact with their digital platforms. It provides data and insights on user behavior, traffic sources, and other important metrics to help businesses make informed decisions about their online presence.
In this guide to GA4, we’ll delve into fundamental aspects of the platform with:
- What GA4 is and How to Create a GA4 account
- How to Install GA4 on Shopify and Test your GA4 Shopify Tracking
What is Google Analytics (GA4) and How to Create a GA4 account?
Google Analytics 4 (GA4)
Google Analytics 4 (GA4) is a web analytics tool for your website or app. It tracks and helps you see what people do when they visit, like clicking, scrolling, purchasing, and other actions across various platforms and devices.
Unlike the old version Universal Analytics, GA4 now pays more attention to what users are up to (called event) rather than just how long they stay on your site (called session). This means you get clearer data of user actions and better user privacy protection as it doesn’t reveal customer identity.
Plus, it’s smart – it can even make predictions when there’s not much info to go on thanks to its use of AI and machine learning.
Overall, GA4 is like having a super-powered sidekick for your data tracking needs!
What can GA4 help your Shopify store?
You can use GA4 to uncover insights into how people use your website or app throughout their journey. With its data, you can make your content better, your marketing smarter, and your customer journey smoother.
Whether you’re a business owner, SEO pro, or marketing guru, GA4 has got your back.
Here are some cool things you can do with it:
- Analyze user behavior across platforms and devices
- Boost your SEO game
- Supercharge your marketing campaigns
- Create detailed customer profiles
- Track how well your online store is doing
- Make your website or app even more user-friendly
How to Create a GA4 account?
Wondering what to do if you’ve never used Google Analytics? Here’s a step-by-step guide:
Step 1: Access Google Analytics
- Go to https://analytics.google.com.
- Click on the “Start measuring” button in the browser that follows.
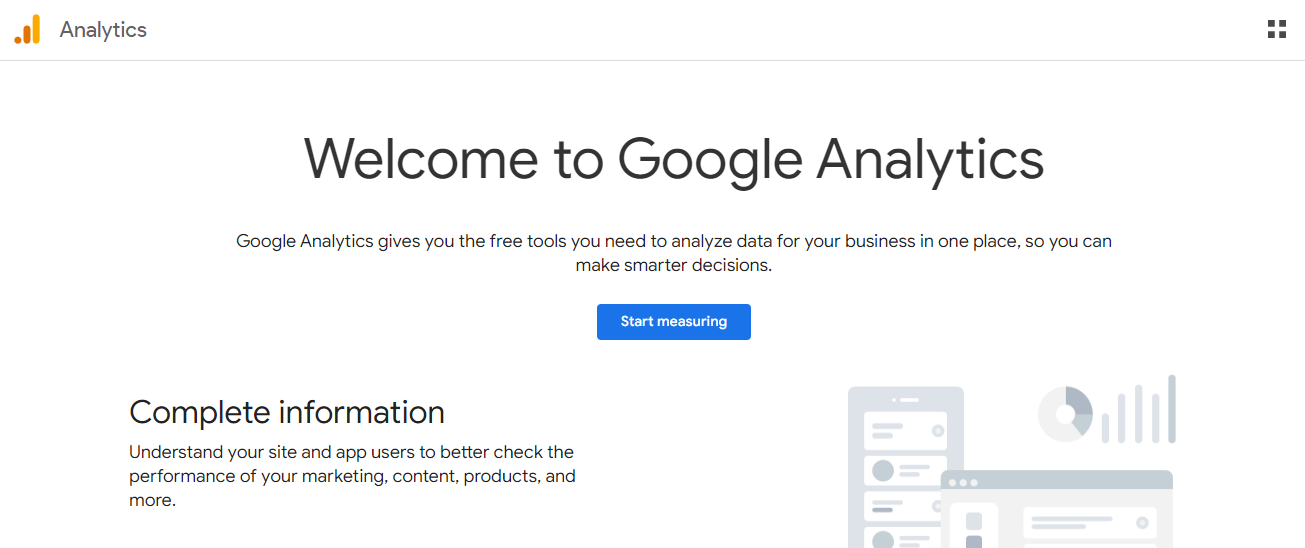
- You are then redirected to the “Create an account” page.
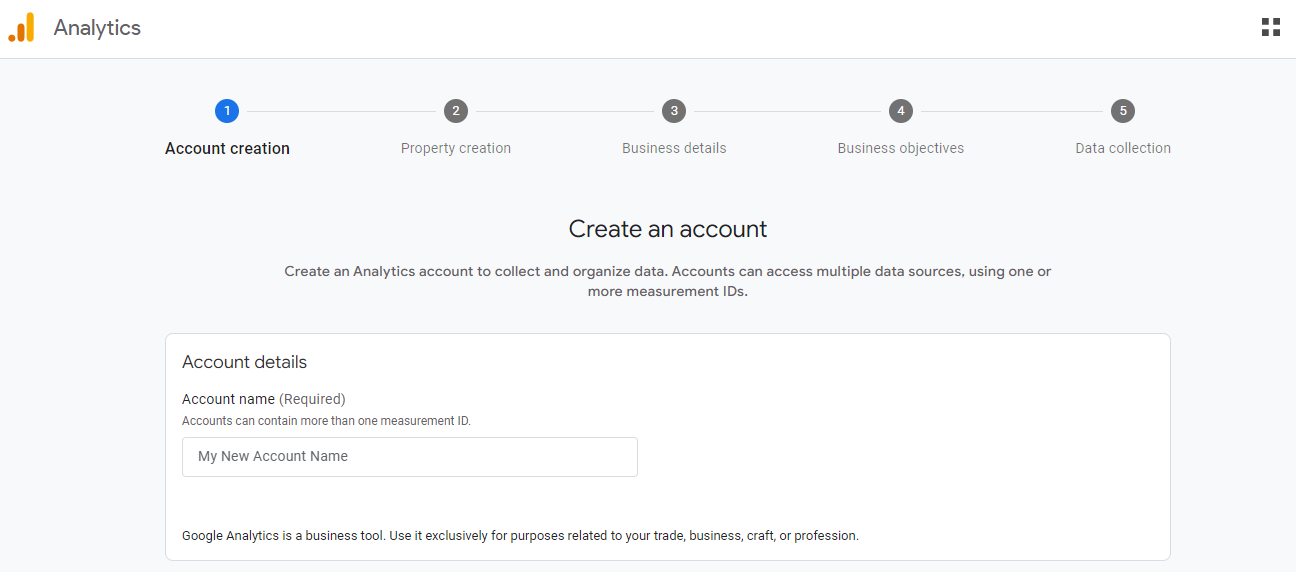
Step 2: Enter Account Name and Edit Settings
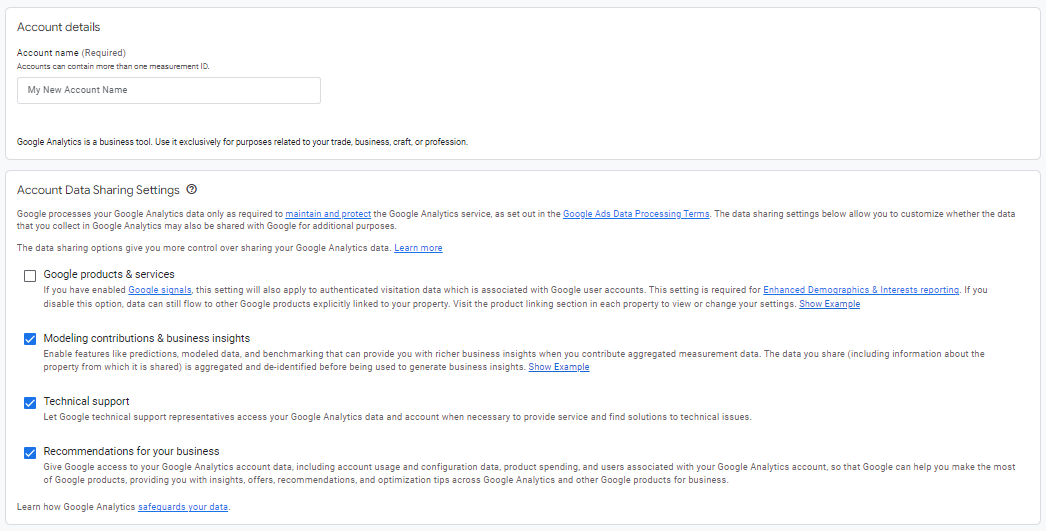
- Type your business or website name in the “Account Name” box.
- Choose types of data you need to share with Google.
- Click “Next.”
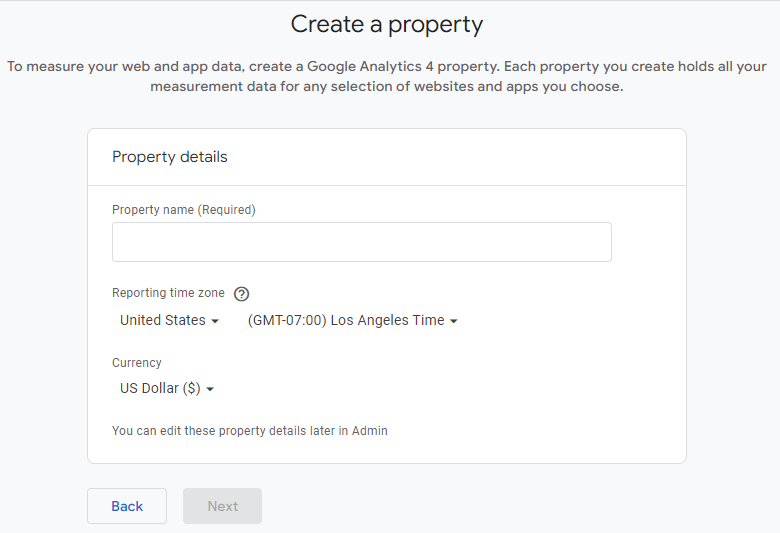
Step 3: Set Up Your Property
- Type a name in the “Property Name” box. Then set your business’s time zone and currency for accurate reporting.
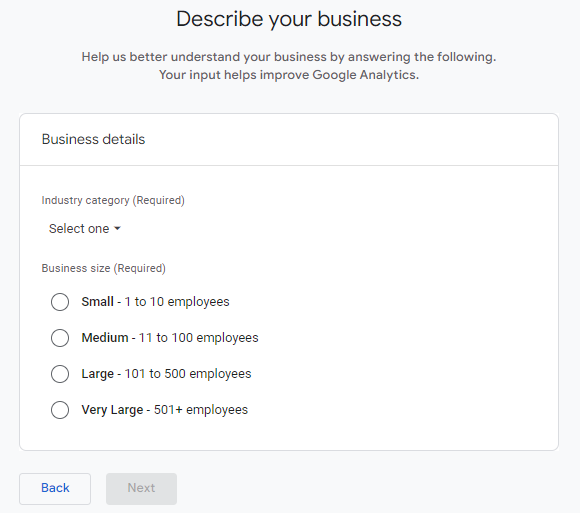
- Next, you’ll need to answer some questions to describe your business.
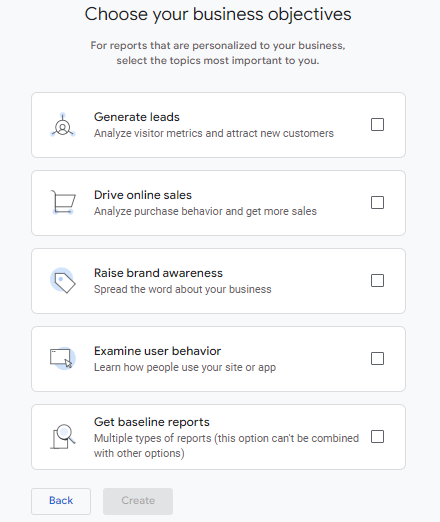
- You’ll then need to choose your business objective.
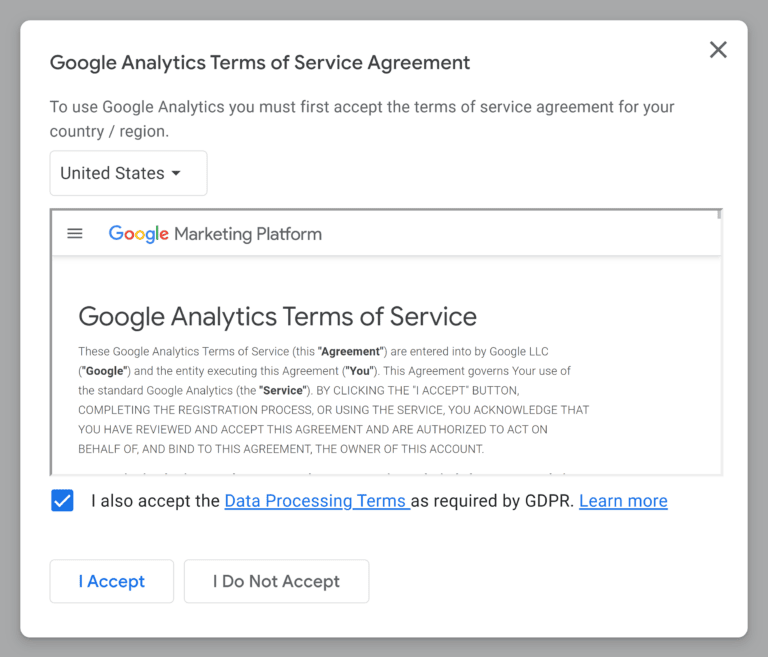
- Lastly, accept the GA4’s terms of service.
Step 4: Set Up a Data Stream
- To add your web store, click “Web”.
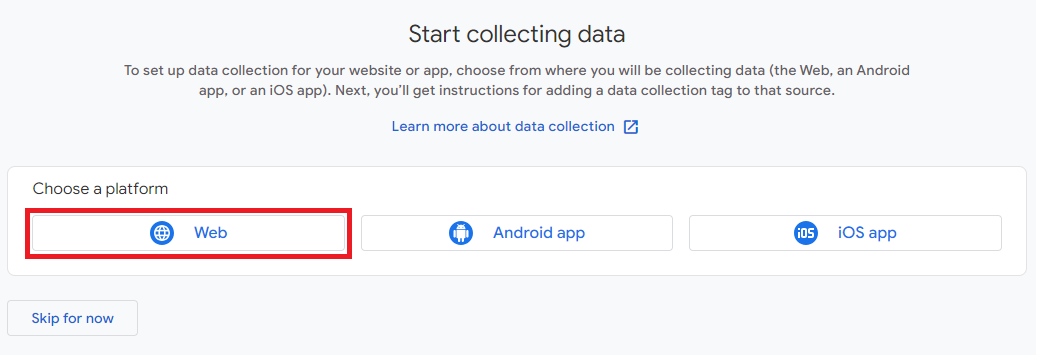
- Enter your website’s URL and a stream name > Hit “Create stream”.
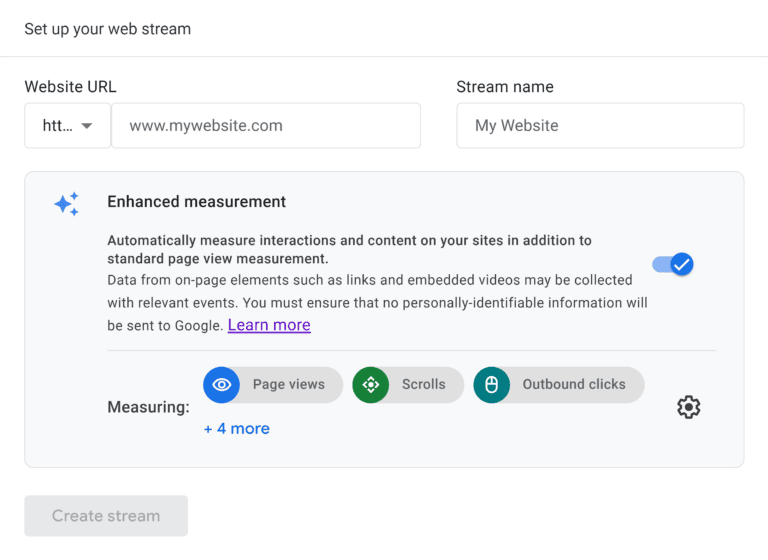
It’s advisable to keep “Enhanced measurement” on. GA4 will then be able to automatically track activities such as downloading, clicking links, playing videos, and more.
After clicking “Create Stream,” you’ll see your “Web stream details”.
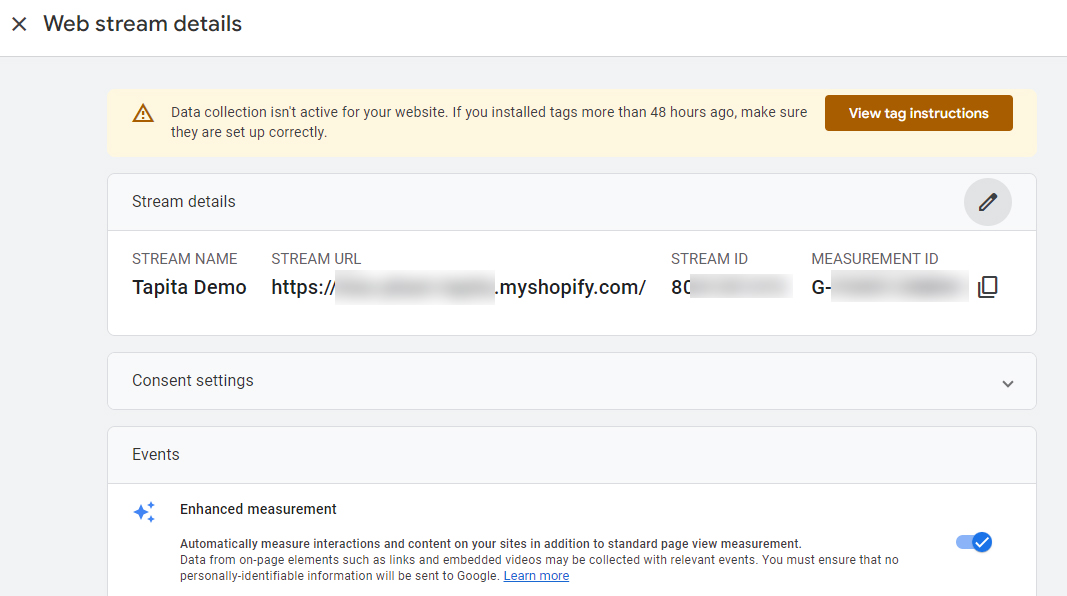
When your data stream is created, you will see “View tag instructions” to add the GA4 code to Shopify. You will need these in some of the next steps.
How to Install GA4 on Shopify and Test your GA4 Shopify Tracking?
Installing the tracking code on your web store is the next step in linking it to GA4.
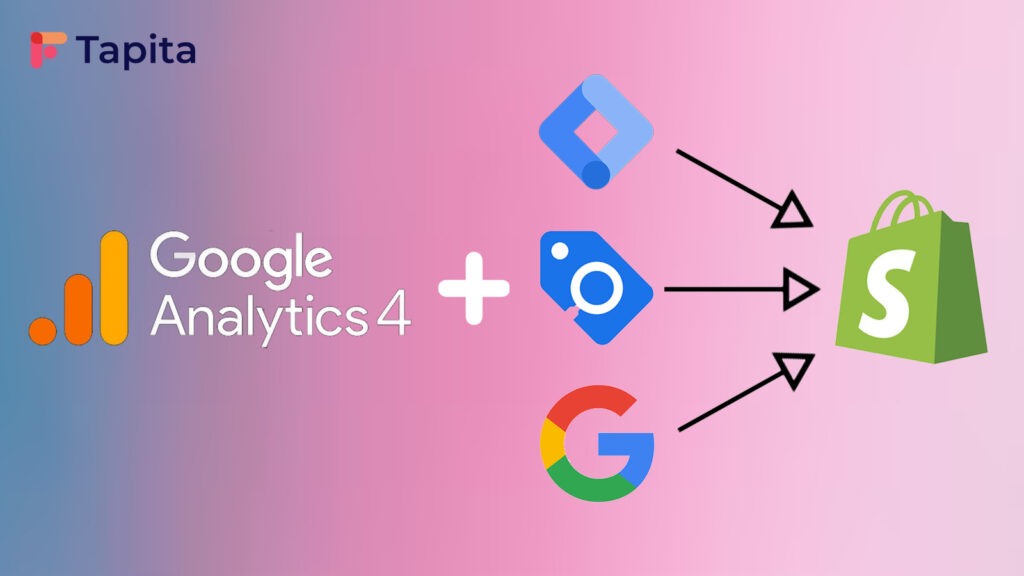
To include this code into your Shopify store, you have three choices:
- Install with Google & YouTube App
- Install manually with Google tag
- Set up with Google Tag Manager
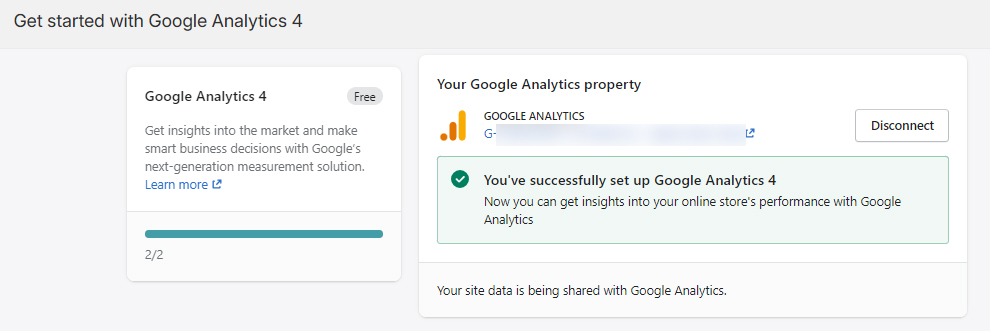
Shopify GA4 Integration with Google & YouTube App
When you link your GA4 account to your Shopify store via this app, the GA4 tracking is automatically set up for your store. Plus, you’ll start tracking ecommerce events right away without any extra setup.
The ecommerce events automatically tracked with Google & YouTube App are:
- add_payment_info
- add_to_cart
- begin_checkout
- purchase
- view_item
- page_view
- scroll
- click
- view_search_results
- video_start, video_progress, video_complete
- file_download
- form_start, form_submit
If you’re considering tracking these events using Google Tag Manager (GTM), it might get a bit tricky. You see, GTM might struggle with handling product variants, possibly leading to some mix-ups in your reports. But fear not! If you stick to using Shopify’s GA4 Integration, everything runs smoothly. Shopify makes sure your product variants are handled correctly, and your GA4 reports stay accurate.
There are some ecommerce events that won’t get tracked automatically with the Google & Youtube Channel App for Shopify:
- add_shipping_info
- remove_from_cart
- select_item
- select_promotion
- view_cart
- view_item_list
- view_promotion
However, these events can be tracked via GTM with the exception of “add_shipping_info” and “remove_from_cart”.
Therefore, you can not rely just on the Google & YouTube App for a complete GA4 Shopify tracking setup.
Use both Google & YouTube App and GTM for a complete Shopify GA4 tracking setup.
Follow the steps below to add the application to your Shopify store:
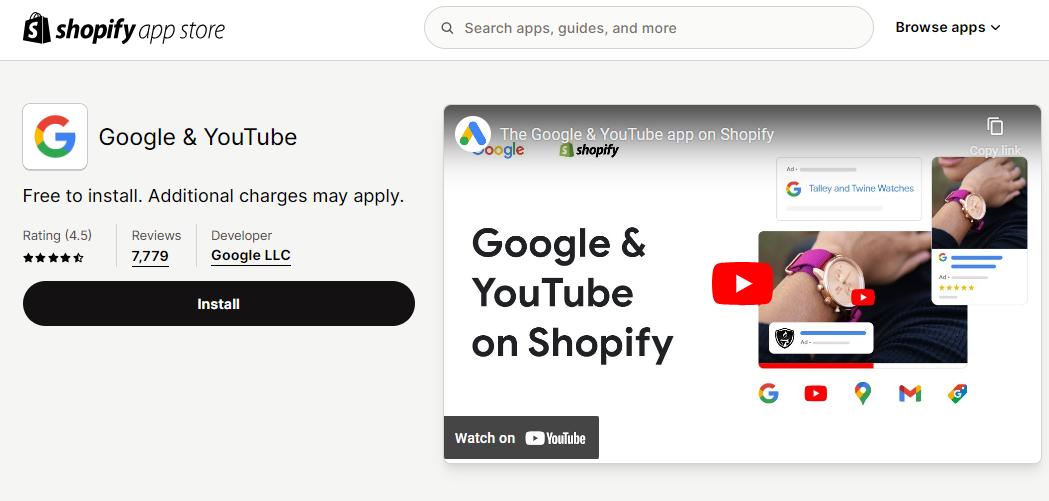
- In the Shopify Admin, click on the “App” menu and search for “google and youtube”.
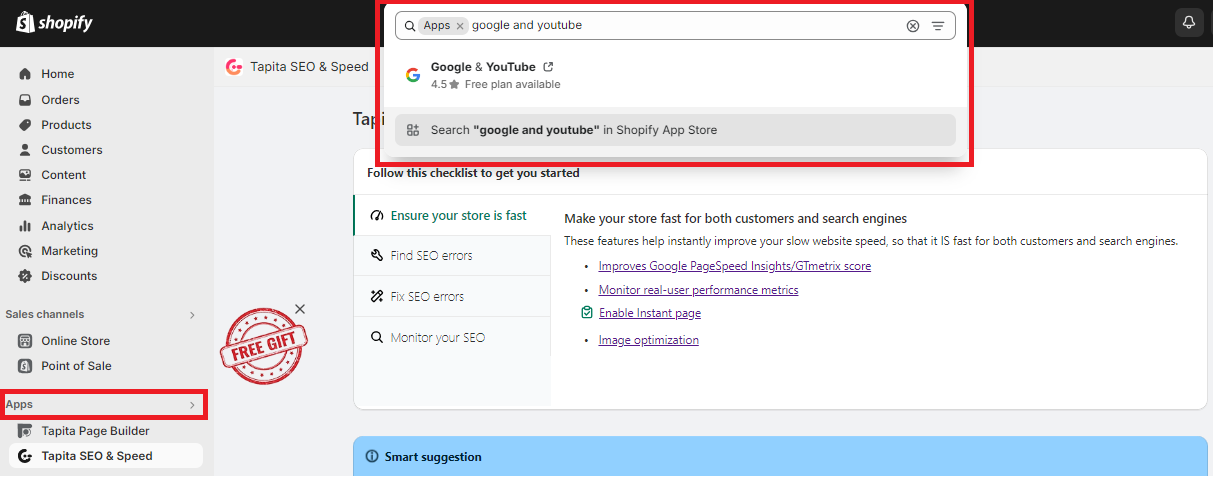
- Click on the app, and you are automatically redirected to the Shopify App Store browser. Click on the “Install” button:
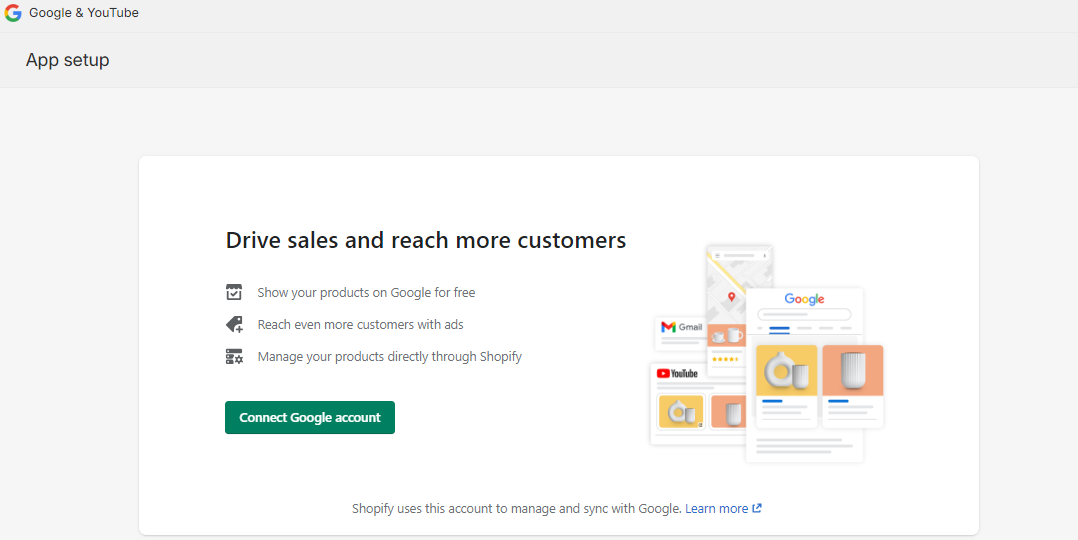
- Click on “Connect Google account”.
- Click on “Get Started”.
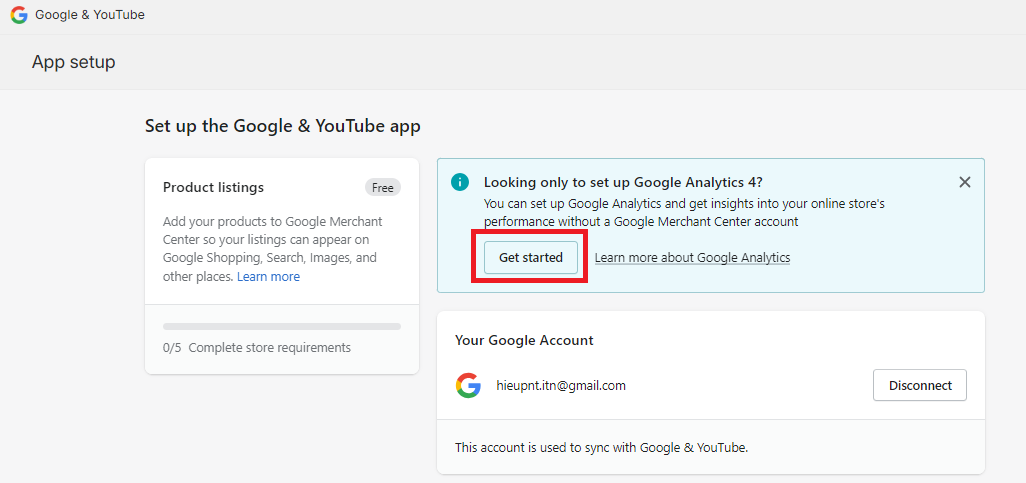
Select your GA4 property from the drop-down menu and hit “Connect”.
Note: When you’re picking your GA4 property from the drop-down menu, double-check it lines up with your Measurement ID and Property ID. Your Measurement ID is what links up your web data stream to your Shopify store, so it’s important to get this match just right!
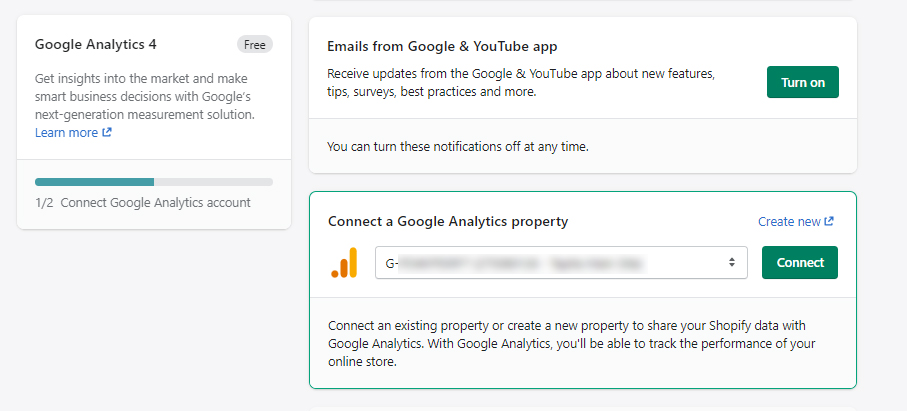
Then, you should see a message as follows:
Let’s see how it works in Google Analytics.
- Go to Google Analytics > “Admin” > “Data Display” > “DebugView”
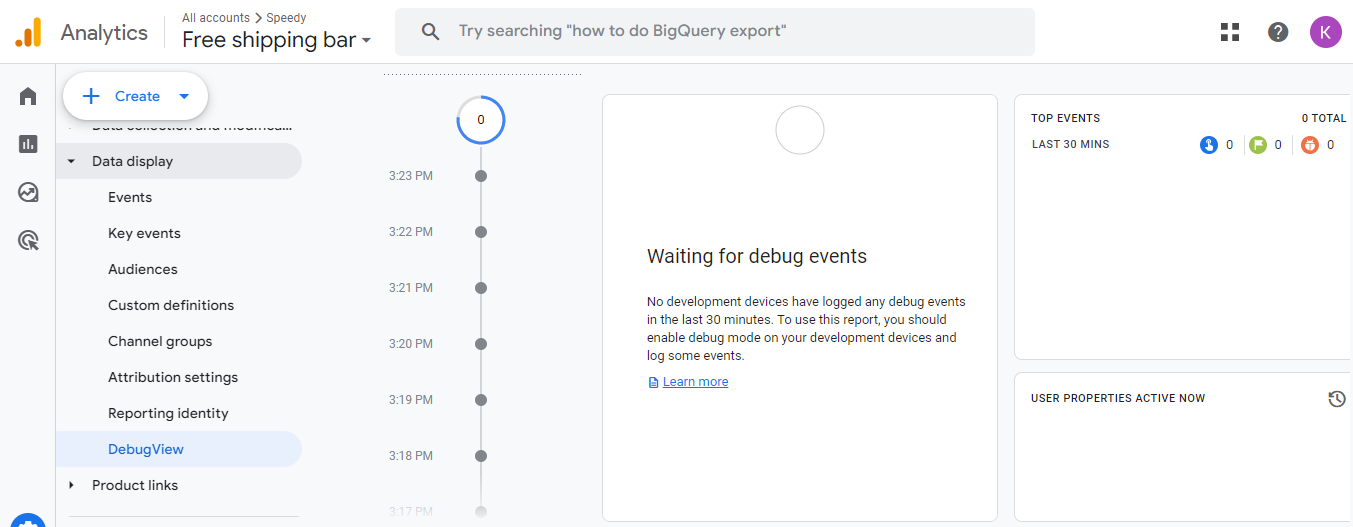
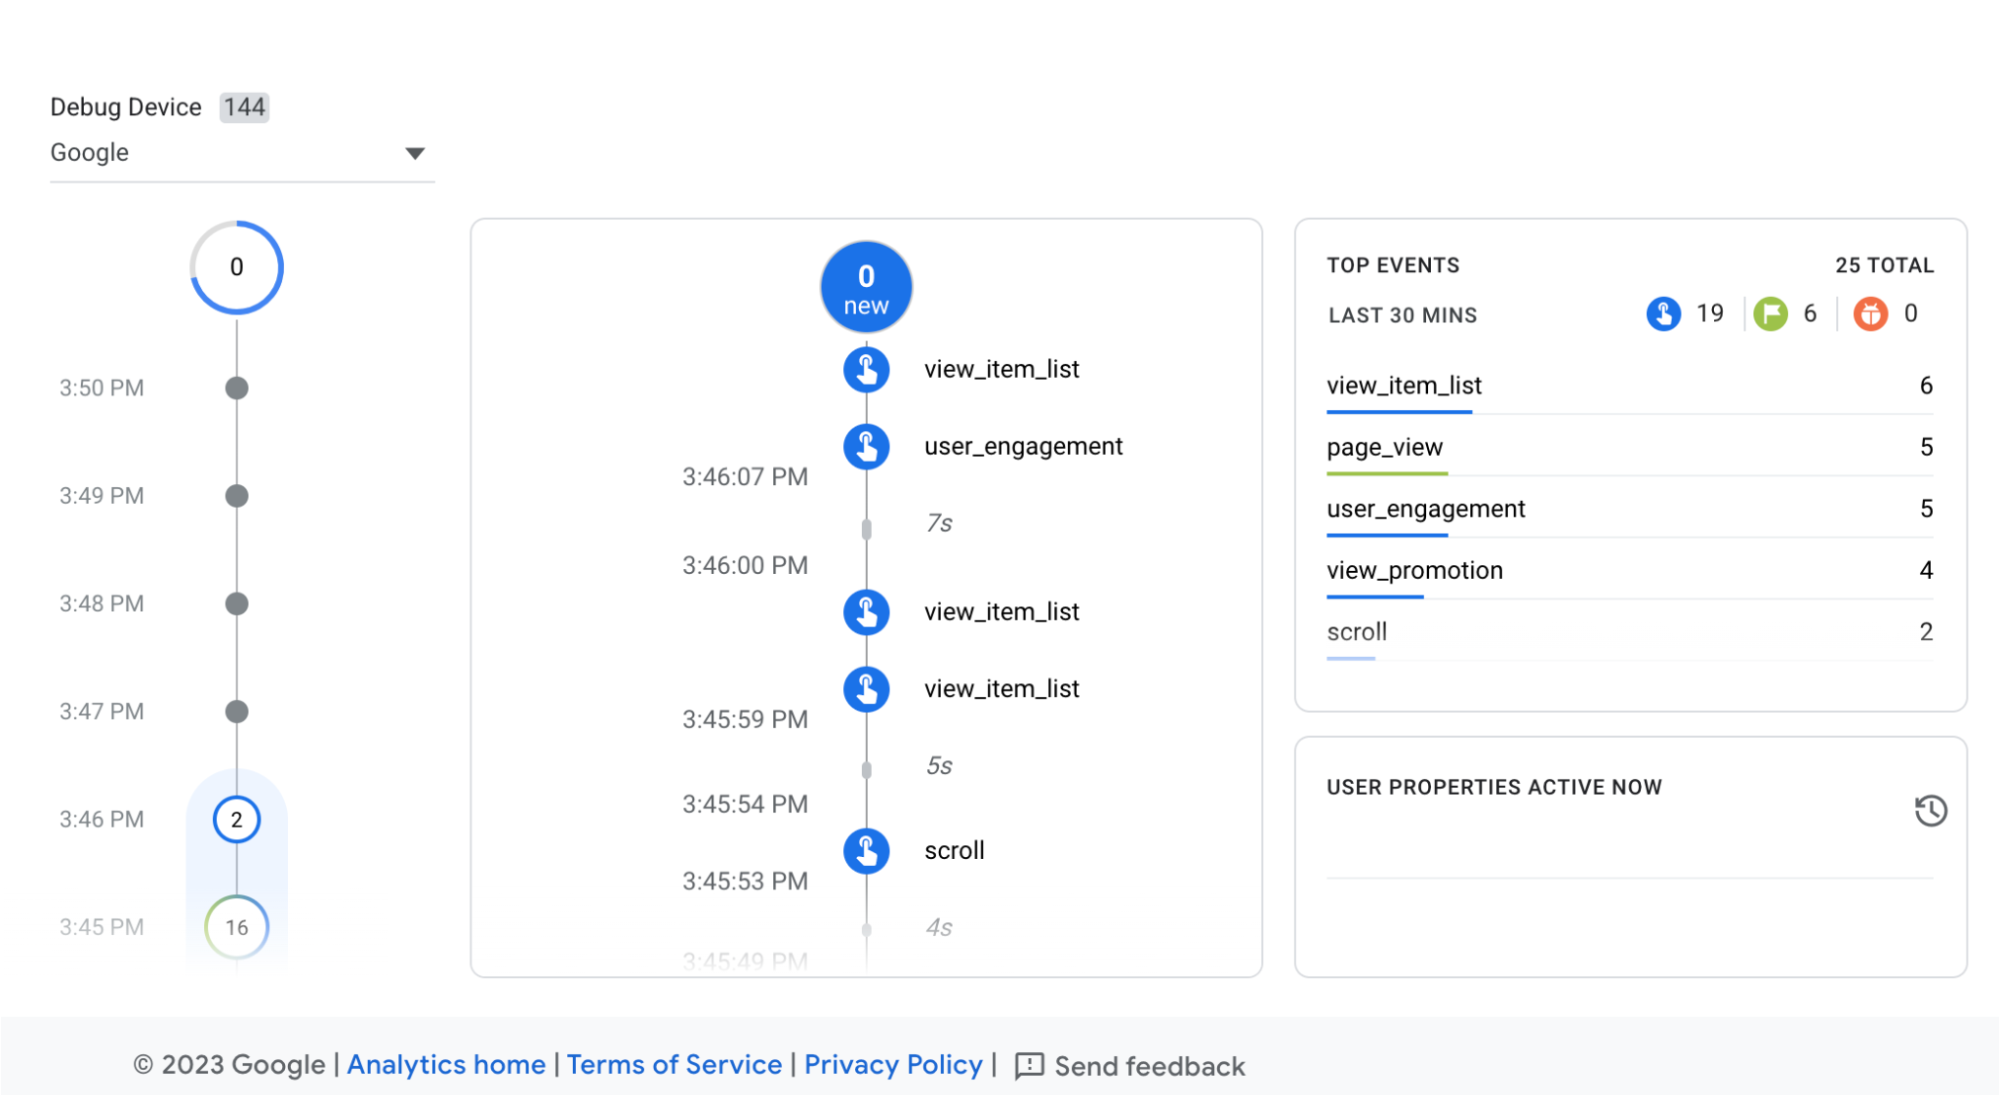
This Debug Device shows any events that happen on your website in real-time.
It might take some time for the page to load when you refresh to view updates. In the interim, you may click on different options directly on your website to generate data that will then appear on the screen.
Once the site loads, data appears as a page_view event whenever we access the store page. Or when we open the store page and scroll to the bottom, it generates a scroll event.
Set up GA4 with Google tag (GTAG)
This is a manual installation.
You’ll find detailed instructions for installing the tool when you click “View tag instructions“.
This handy guide helps you easily add the GA4 code to your website, whether you’re using a regular web platform or a CMS like WordPress or Shopify.
Here’s what you need to do:
- Click on “Install manually” to access the JavaScript code.
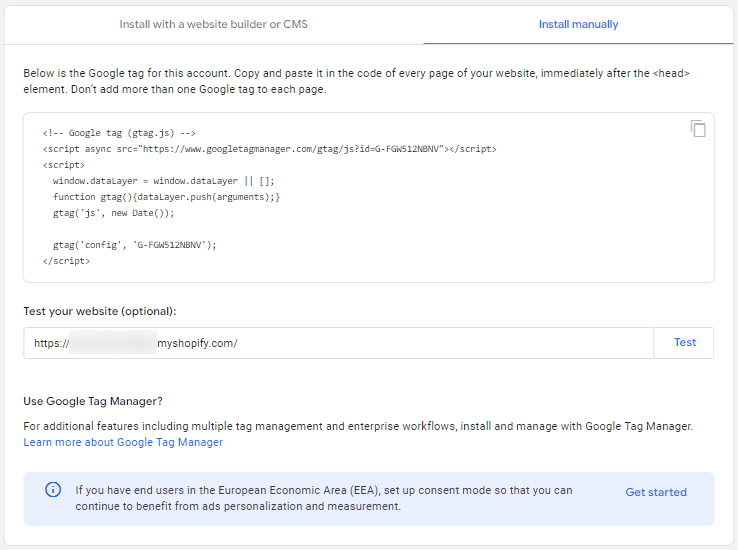
- Then, copy the code.
- Access Your Shopify Admin Dashboard.
- In the Shopify Admin, go to Online Store > Themes.
- At your current theme, click Actions > Edit code.
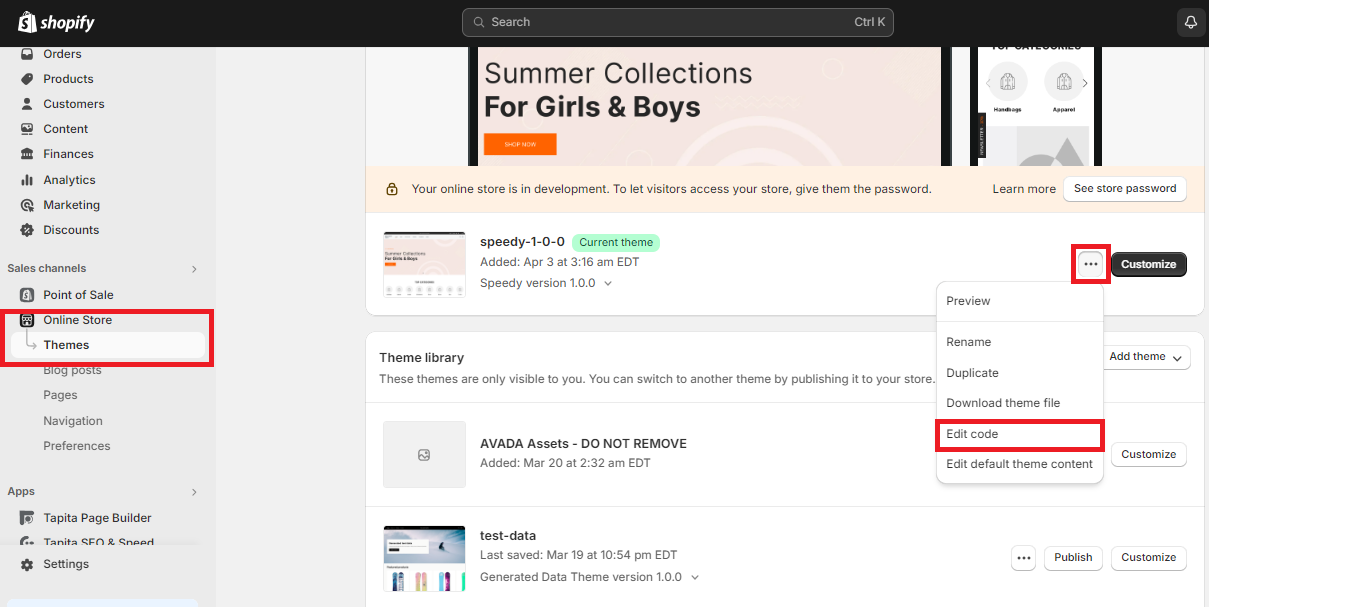
- Locate the theme.liquid file. In the list of theme files, locate and click on the theme.liquid file. This file contains the main HTML structure of your theme.

- You’ll need to paste this code in the <head> section of the file, right below the <head> tags like this.
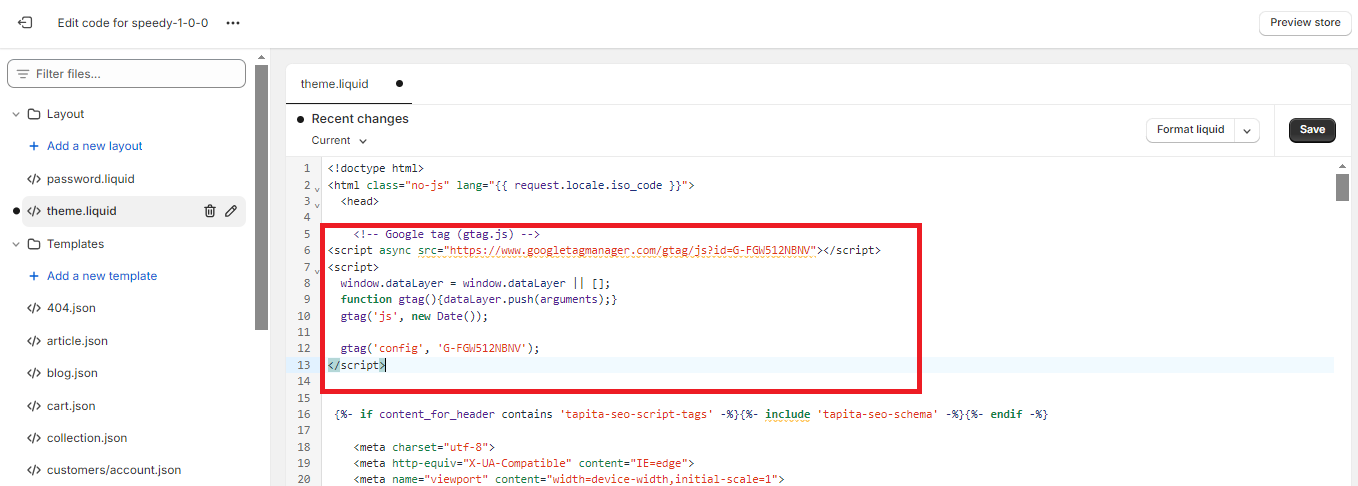
- Click “Save”.
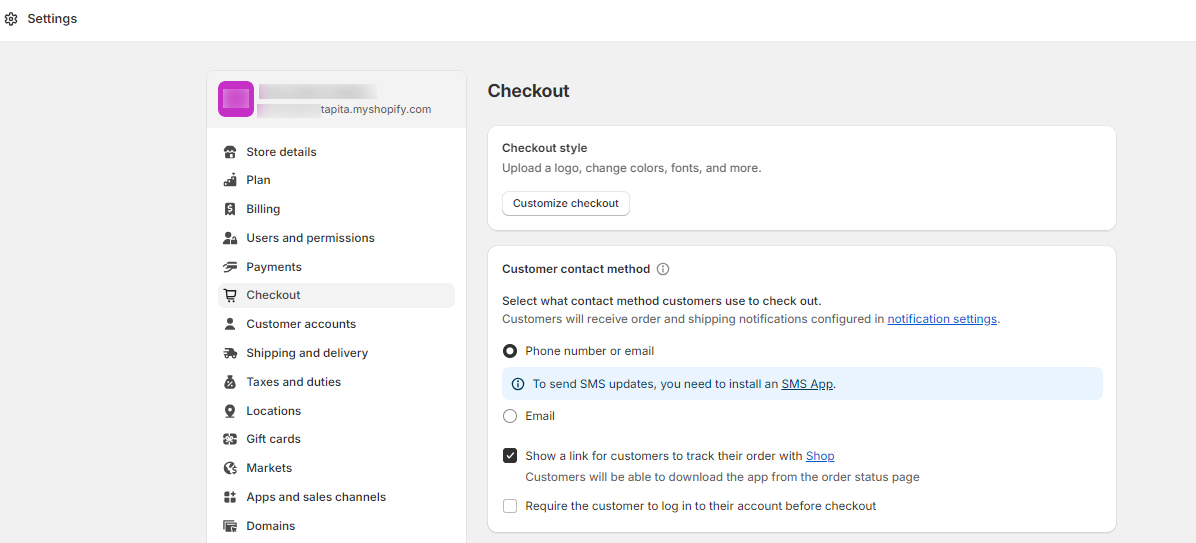
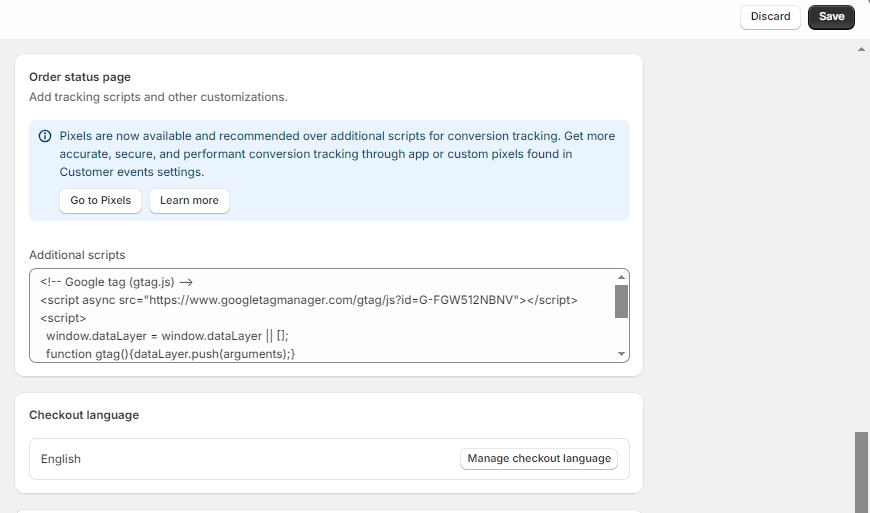
You can also add Google tag to the Thank You page:
- Go to Settings → Checkout.
- Scroll down to see Additional scripts section. Paste the code and hit “Save”.
- You can test the setup by going to the DebugView in GA4.
Set up GA4 with Google Tag Manager
After installing Google Tag Manager, you also need to install Google Analytics 4 in your Shopify store properly to measure its performance.
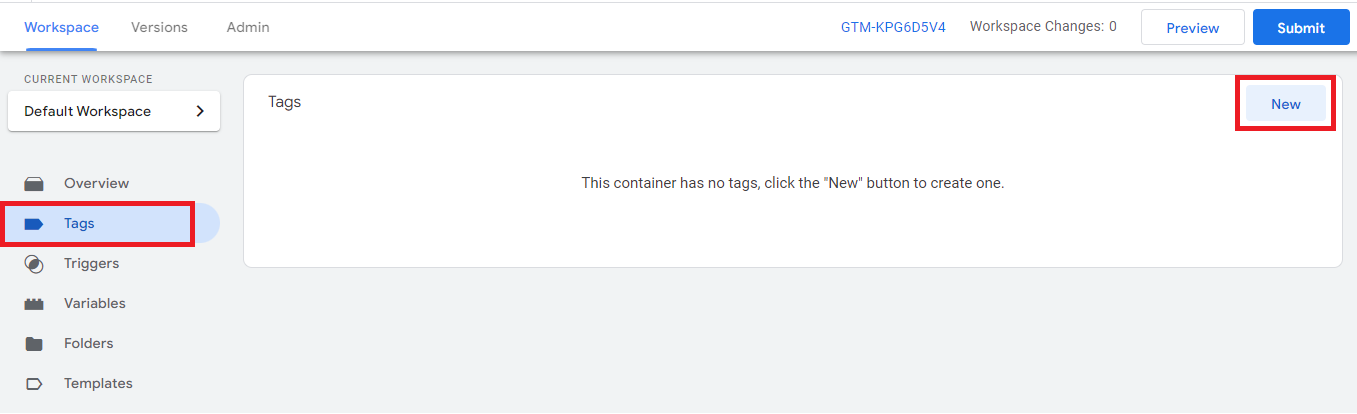
- Go to “Workspace” window of Google Tag Manager, click on “Tags” on the left dashboard, and hit “New”.
- Enter your own tag title in “Untitled Tag” blank. For example, “GA4 Configuration”.
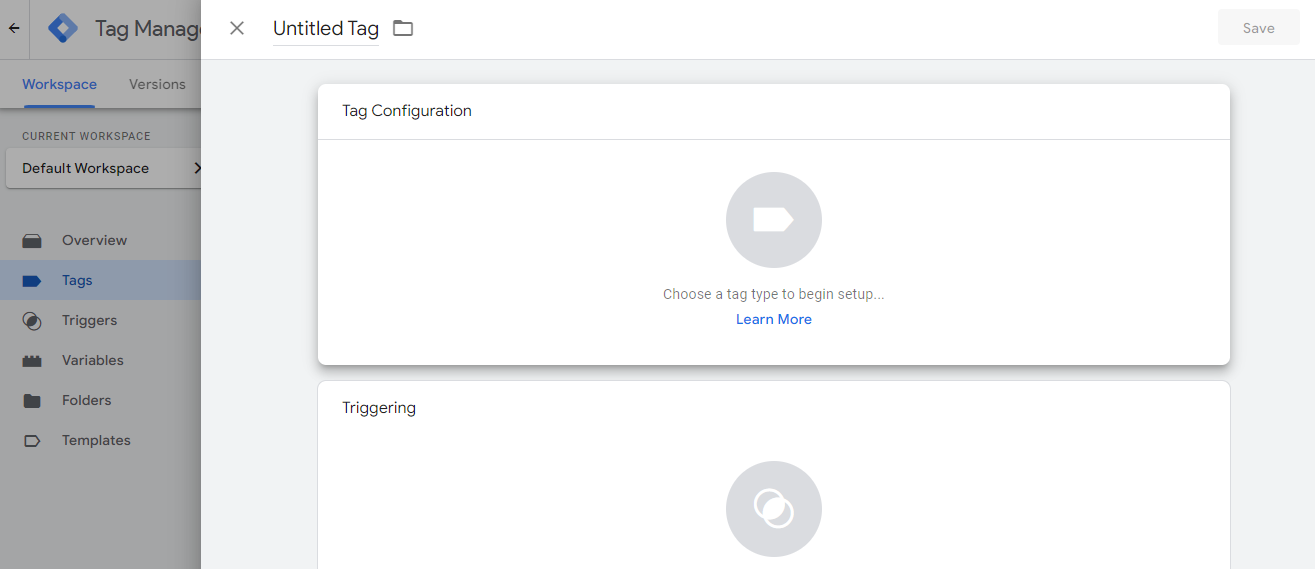
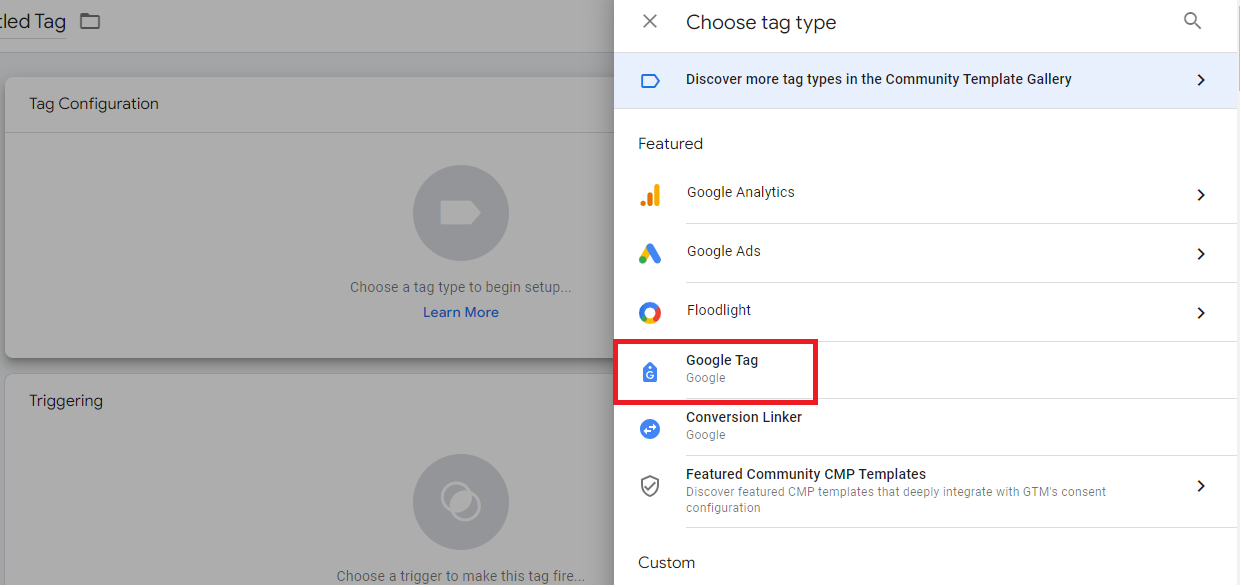
- Upon clicking on “Tag Configuration”, choose the tag type of “Google Tag”.
- Under Tag ID, paste your GA4 Measurement ID code.
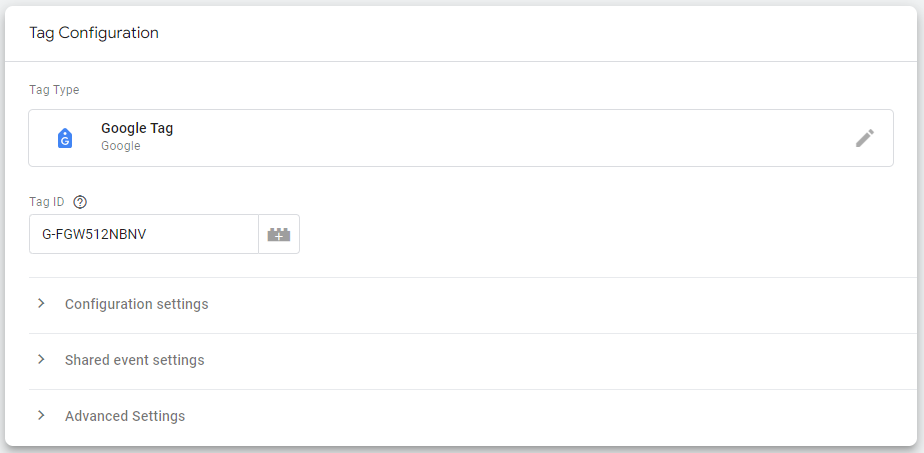
- Upon clicking on “Triggering”, choose a trigger as “All Pages”.
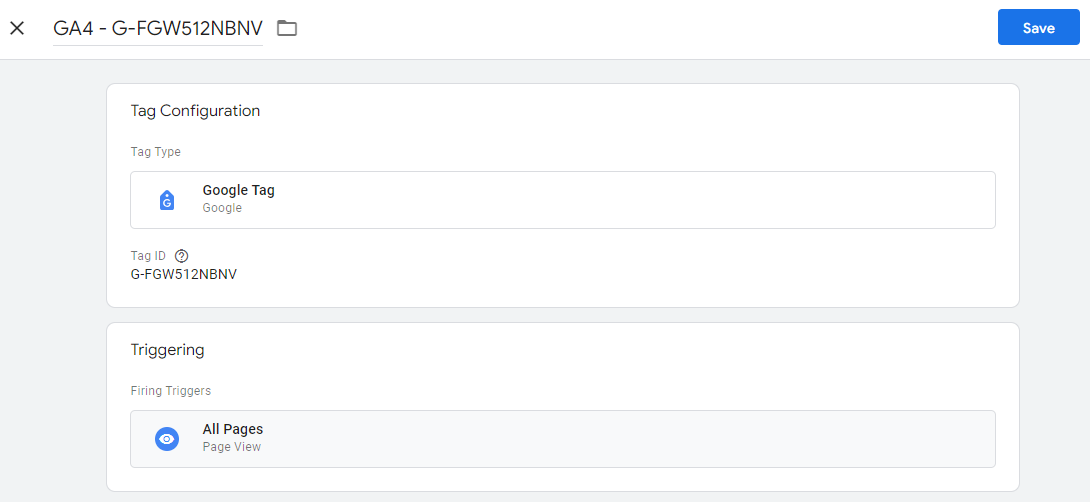
- Click Save.
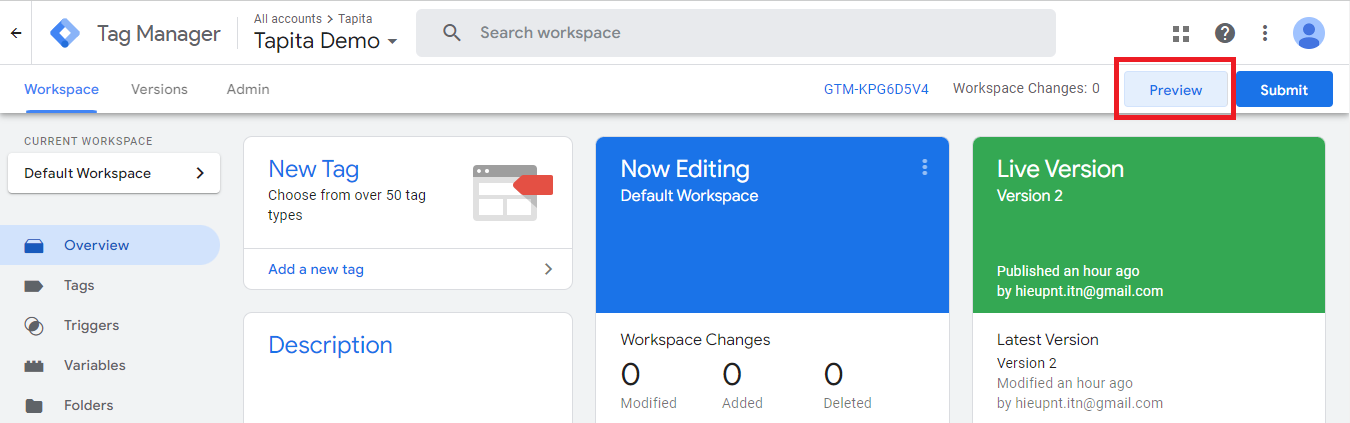
- Once done, hit “Submit” > “Publish” > “Skip”.
- In the Workspace page, click on “Preview”
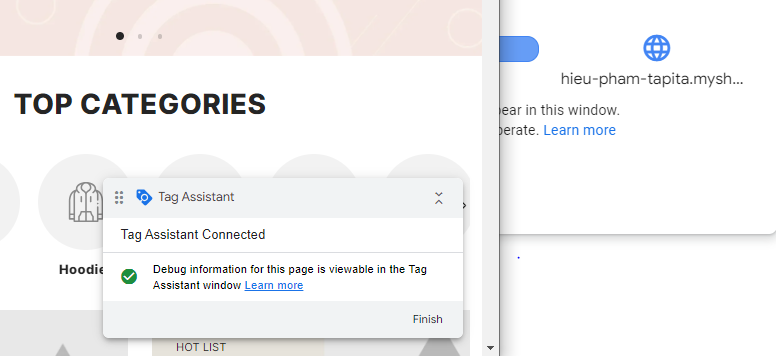
- To Connect Tag Assistant to your site, enter Your website’s URL and hit “Connect”.
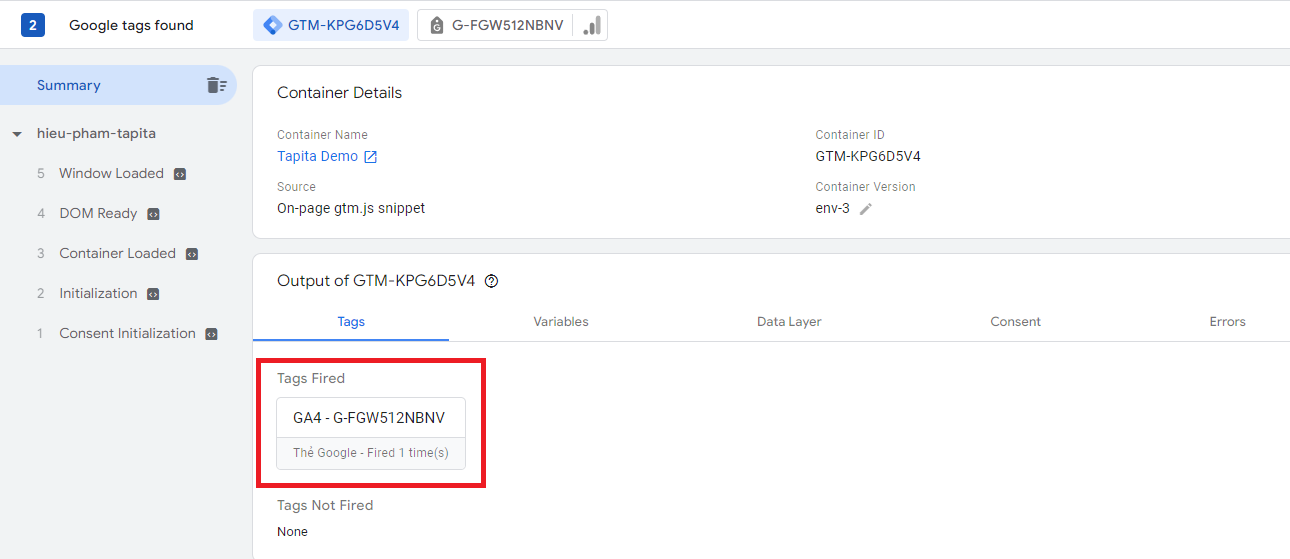
You should also see, if your Google tag is now under “Tags Fired”, you should be good to go.
- Test the setup with DebugView in your GA4 property.
Conclusion
Adding Google Analytics 4 to your Shopify store is super important for understanding your website visitors and their behaviors. Just follow the steps we’ve outlined: create a GA4 account, install it on Shopify, and then test it out to manage how it works. Whether you go with Google Tag Manager, Google tag (GTAG), the Shopify GA4 Integration with the Google & YouTube Channel App or combination of those, you’ll be tapping into a treasure trove of data to help your business grow. With GA4, you’ll get to know your audience better, make your website even better, and reach your goals in the online world. Happy tracking!