
Shopify is a leading ecommerce platform that originated in Canada, and is a highly functional service that has the No. 1 market share in the world. Whether you’re a small business owner, entrepreneur or a hobbyist, Shopify is a great option for building and growing your online business. It is also strong in cross-border e-commerce, so it can be said that it is a platform suitable for those who are considering expanding overseas.
In this step-by-step tutorial, we will guide you on how to use Shopify for your online store, so you can start selling your products and services online.
Introduction to Shopify
1. Features of Shopify
Shopify offers a wide range of features and tools that make it easy for businesses of all sizes to create and manage their online stores. It provides an all-in-one solution that includes hosting, payment processing, inventory management, and a wide range of customization options. Shopify also offers a large app store with a variety of add-ons and integrations, allowing businesses to customize and enhance their stores as needed.
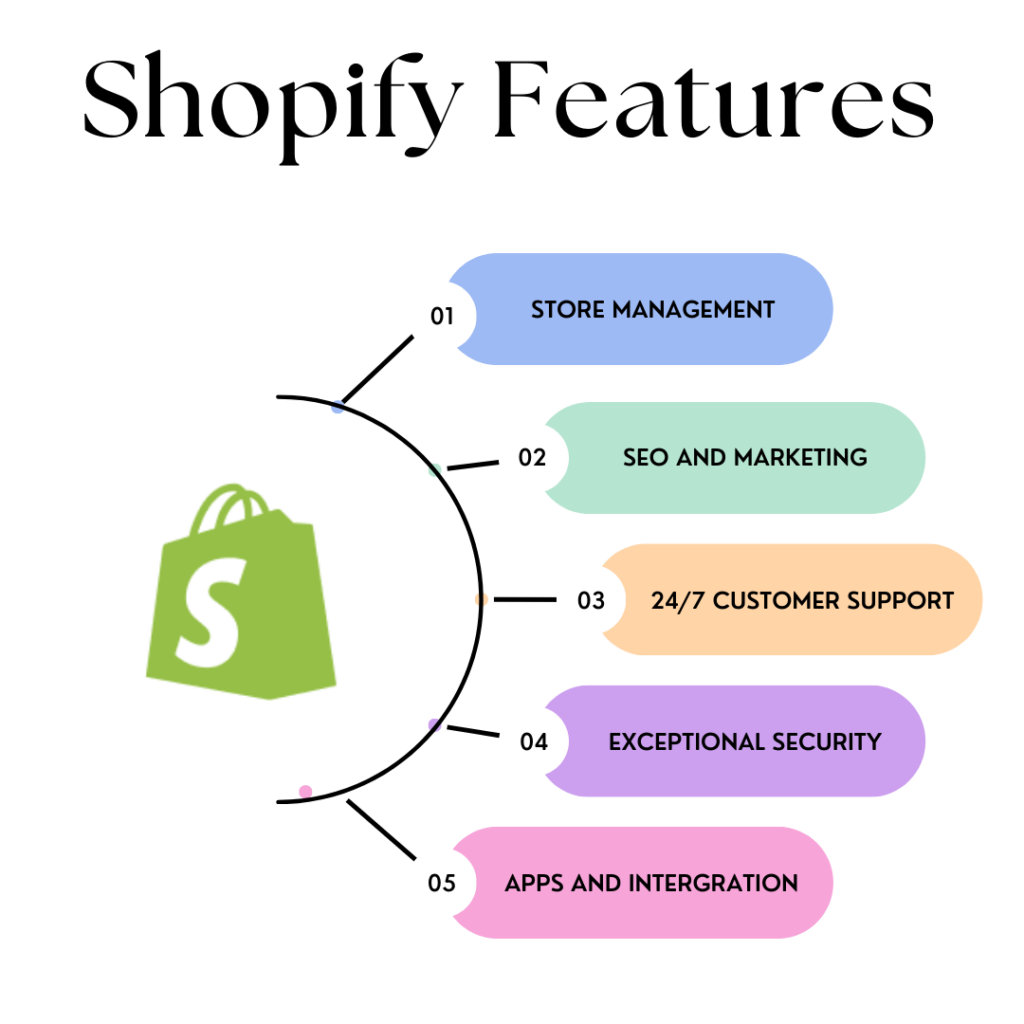
Here are some of the key features of Shopify supporting you to boost your business:
- Website builder: Shopify provides an easy-to-use website builder that allows you to create your online store without any coding knowledge.
- Payment processing: Shopify allows you to accept payments from a range of payment providers, including credit cards, PayPal, and Apple Pay.
- Inventory management: Shopify provides an inventory management system that allows you to track your inventory levels and receive notifications when stock is running low.
- Order management: Shopify provides a range of order management tools, including the ability to process refunds, track orders, and print shipping labels.
- App store: Shopify has a large app store that offers a wide range of add-ons and integrations, allowing you to customize and enhance your store as needed.
- SEO tools: Shopify provides basic SEO tools that allow you to optimize your store for search engines and increase your visibility online.
- Social media integration: Shopify allows you to connect your store to social media platforms, making it easy to promote your store and reach a wider audience.
- Mobile optimization: Shopify stores are optimized for mobile devices, making it easy for customers to shop on your store from their smartphones and tablets.
- Analytics: Shopify provides a range of analytics tools that allow you to track your store’s performance and identify areas for improvement.
2. Pros and Cons of Using Shopify
Advantages
Advantage 1: All-in-one solution
Shopify provides a complete e-commerce solution, including hosting, payment processing, and inventory management. This means that Shopify provides everything you need to set up and run an online store, all in one place.
Overall, Shopify’s all-in-one solution makes it easy for anyone to set up an online store without any technical expertise, while providing all the tools and features needed to run a successful e-commerce business.
Advantage 2: High scalability and strong customization
Shopify is highly extensible, and it is possible to bring it closer to your ideal design and functions through customization. If you do not have specialized knowledge, you can build a highly functional shop just by choosing from the templates prepared in advance.
In addition to the design of the shop, detailed settings such as delivery are also substantial, and it can be said that it is attractive to be able to accurately reproduce the wide variety of operation methods depending on the shop.
Since it is used all over the world, there are many production companies, and various companies have know-how about Shopify, so even if you are considering outsourcing, you can choose a partner that suits your company from a variety of options.
Advantage 3: Handle cross-border eCommerce
Shopify is a platform that can handle cross-border e-commerce, so it is especially recommended if you are considering expanding overseas
Here are some of the benefits of Shopify’s cross-border capabilities:
- Multi-currency support: Shopify allows you to sell products in multiple currencies, which makes it easier for customers from other countries to shop in your store. This feature can help increase your sales and expand your customer base.
- International shipping: Shopify integrates with a variety of shipping carriers and allows you to set up custom shipping rates for different regions and countries. You can also add duties and taxes to your shipping rates to provide a transparent and seamless shopping experience for your customers.
- Localization options: Shopify allows you to customize your store’s language, currency, and date format based on your target audience. This helps to create a more personalized shopping experience for your customers and can help you build a strong brand presence in different countries.
- Payment gateway integrations: Shopify integrates with a variety of payment gateways that support different currencies, including PayPal, Stripe, and other popular gateways. This makes it easy for you to accept payments from customers all over the world.
- Shopify Plus: If you have a large and growing international business, Shopify Plus provides advanced features, such as multi-currency checkout, that make it easier to handle cross-border e-commerce.
Shopify’s cross-border capabilities make it easier for businesses to expand into new markets and sell products to customers in different countries. The platform provides a seamless and customizable shopping experience for customers around the world, which can help businesses increase sales and revenue.
Disadvantages
Disadvantage 1: Limited ownership
One of the potential disadvantages of using Shopify is the limited ownership of your online store’s code and data. Because Shopify is a hosted platform, your online store’s data and code are stored on Shopify’s servers, and you don’t have full access to them.
This can limit your ability to customize your online store beyond what Shopify allows, and may also limit your ability to migrate your online store to another platform in the future. While Shopify allows for some degree of customization through its themes and apps, you may not be able to make the specific changes that you want, or to create entirely new features that are not already offered by Shopify.
Another potential issue is that your online store’s data is stored on Shopify’s servers, which means that you do not have complete control over it. While Shopify takes measures to ensure the security and privacy of your data, you may not be able to guarantee its security and privacy to the same extent that you would if you were hosting your online store on your own servers.
To address this issue, Shopify offers a number of export tools that allow you to download your online store’s data, including product information, customer information, and orders. However, these tools may not give you full access to your store’s code, and may not allow you to easily migrate your store to another platform.
Disadvantage 2: Transaction fees
In addition to the monthly fees, Shopify also charges transaction fees for each sale made through its platform. These fees vary depending on the pricing plan you choose and whether you use Shopify Payments or a third-party payment gateway.
If you use Shopify Payments, which is Shopify’s built-in payment gateway, you will be charged a credit card fee that ranges from 2.4% to 2.9% + 30 cents per transaction, depending on your pricing plan. This fee is in addition to the monthly fee you pay for using Shopify.
If you use a third-party payment gateway, such as PayPal or Stripe, you will be charged a transaction fee of 2.0% per transaction on the Basic Shopify plan, 1.0% per transaction on the Shopify plan, and 0.5% per transaction on the Advanced Shopify plan. You will also be charged the credit card fee charged by the payment gateway.
It’s important to keep in mind that these transaction fees can add up over time, especially for stores with high sales volumes. If you are using a third-party payment gateway, it’s important to factor in these fees when calculating your profit margins and pricing your products.
To minimize transaction fees, it may be worth considering using Shopify Payments, which can help streamline the payment process and reduce fees. However, it’s important to compare the fees charged by Shopify Payments with other payment gateways to determine which option is best for your business.
How to Use Shopify for Your Online Store?
From registering with Shopify to launching your store, there are a few steps you need to take to prepare. Here, we will explain the specific flow until you can open a store.
- Set Up a Shopify Account
- Add Products to Your Store
- Choose and Customize Shopify Theme
- Add a Domain
- Set up Shipping Delivery and Payment Methods
- Subscribe to a Shopify Plan and Launch Your Store
- Boost Your Business with Must-Have Shopify Apps
- Review Your Analytics & Set Up Marketing Tools
Step 1: Sign up for a Shopify account
At the beginning, you can sign up for Shopify Free Trial. It is a simple and straightforward process that only takes a few minutes. Here are the steps to follow:
- Go to the Shopify website: Open your web browser and go to the Shopify website.
- Click on the “Start free trial” button: You can find this button in the top right-hand corner of the Shopify website. Click on it to begin the sign-up process.
- Provide your email address: Enter your email address in the form provided. Make sure it’s a valid email address as you’ll need to verify it later.
- Create a password: Choose a strong password that is at least eight characters long and contains a mix of uppercase and lowercase letters, numbers, and symbols.
- Enter your store name: Choose a unique name for your store. If the name you choose is already taken, Shopify will suggest alternatives.
- Tell Shopify about your business: Answer a few questions about your business, such as what products you sell and what your revenue goals are.
- Complete the captcha: To verify that you’re not a robot, you’ll need to complete a captcha.
- Click “Create your store”: Once you’ve completed the form, click the “Create your store” button to proceed.
- Verify your email address: Shopify will send you an email to verify your email address. Click on the link in the email to verify your account.

During the free trial, you’ll have access to all of Shopify’s features and tools, so you can create a professional-looking store and test out the platform’s capabilities. If you decide to continue using Shopify after the free trial, you can choose a pricing plan that fits your business requirements and budget.
Step 2: Add products to your store
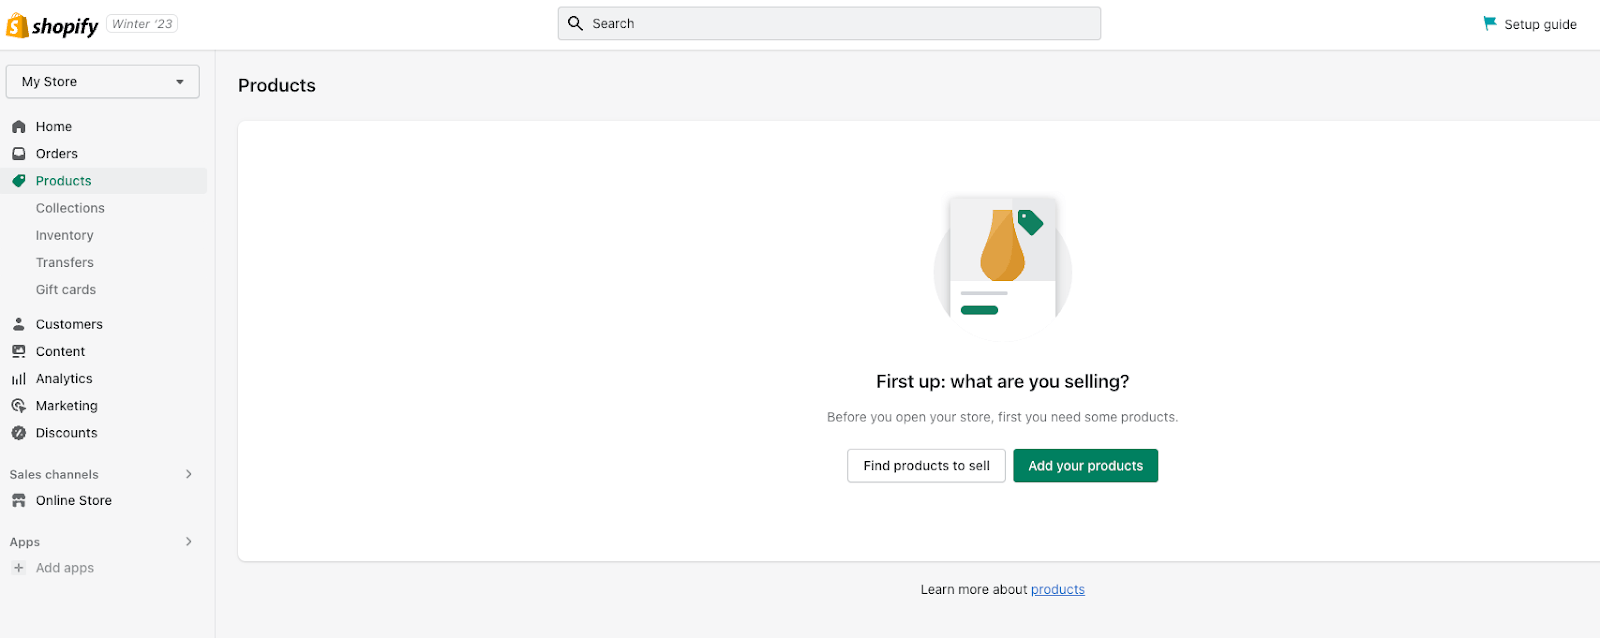
After completing the Shopify account registration, you can log in to the management screen. After logging in, select “Products” displayed on the left side of the management screen, and select “Add your products”.
After transitioning to the product edit screen, there are a total of 8 types of information input screens, including the product name, so fill in the information as necessary to complete the registration. Since detailed SEO measures can be performed in “SEO settings for product pages”, we recommend that you fill in the contents as much as possible.
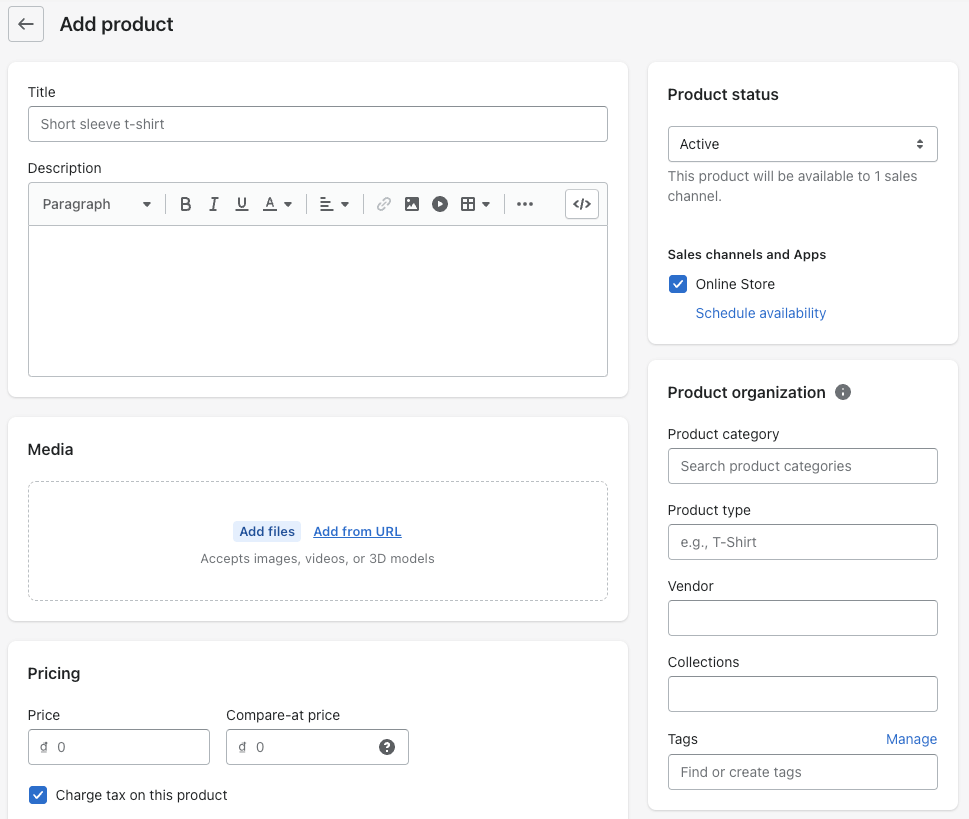
Don’t forget to click “Save” when you’re done.
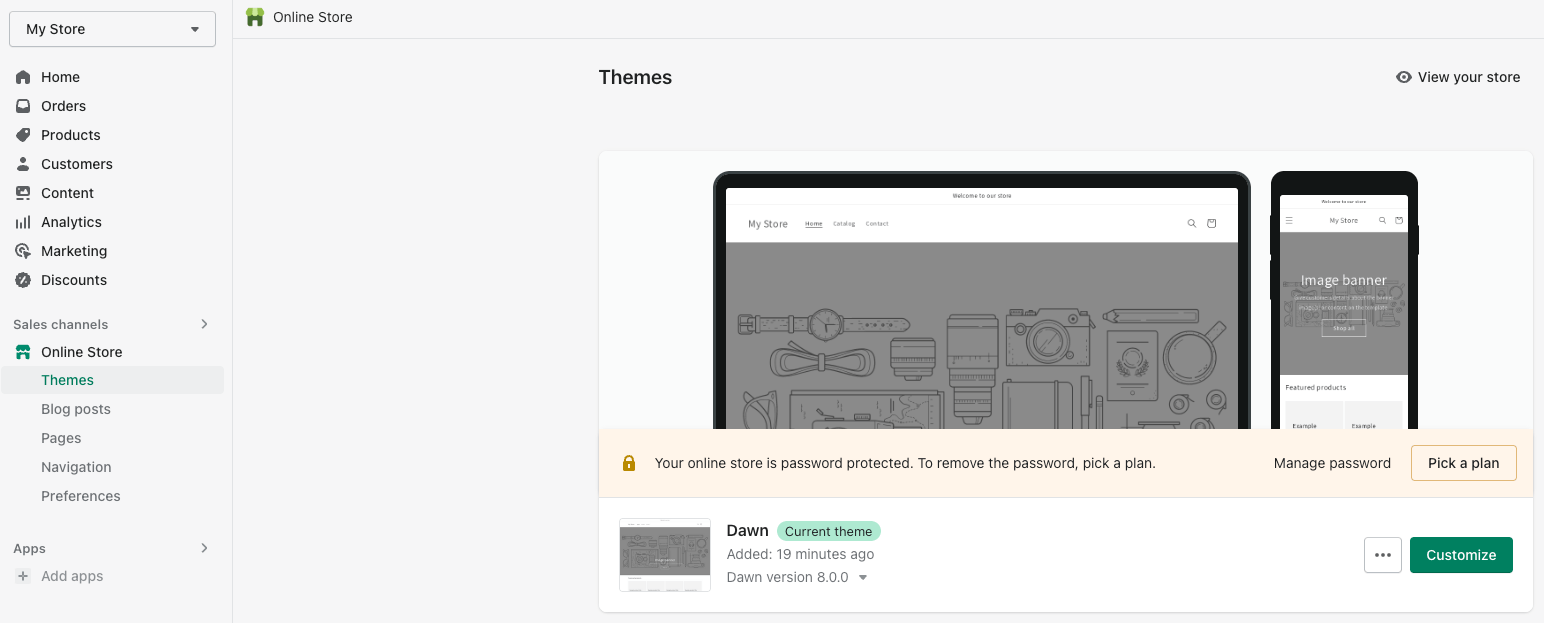
Step 3: Choose and customize Shopify Theme
Customizing your website’s theme is a crucial step in creating a unique and visually appealing online store that represents your brand. Fortunately, Shopify makes it easy for you to customize your website’s theme even if you have no prior web development experience.
Firstly, you should choose a theme that is best suited for your brand and products. Shopify provides a wide range of free and premium themes that you can use to customize your website. You can browse through different themes and find the one that fits your style and the products you are selling.
Once you have selected a theme, you can start customizing it to make it more unique and aligned with your brand identity. With Shopify’s drag-and-drop editor, you can easily make changes to your theme without any coding experience. You can edit elements such as colors, fonts, and layouts to make your store look visually appealing.
Step 4: Add a domain
To add a domain to your Shopify store, you first need to purchase a domain from a domain registrar such as GoDaddy, Namecheap, or Google Domains. Once you have purchased a domain, you can connect it to your Shopify store by following these steps:
- Login to your Shopify account and go to the “Online Store” section of your admin panel.
- Click on “Domains” to see a list of your current domains.
- Click on “Connect existing domain” to connect your domain to your Shopify store.
- Enter your domain name and click “Next”.
- Follow the prompts to complete the setup process, including updating your domain’s DNS settings to point to Shopify.
- Once the domain is connected, you can set it as your primary domain to ensure that all traffic to your store goes to the custom domain.
It’s worth noting that it can take up to 48 hours for your domain to propagate fully, which means that it may take some time before your domain is fully functional. During this time, you may see an error message when you try to access your website.
Adding a custom domain to your Shopify store can help you create a more professional and memorable online presence for your brand. It’s a relatively straightforward process, and with a little bit of effort, you can quickly get your custom domain up and running.
Step 5: Set up Shipping Delivery and Payment Methods
With clear and easy-to-understand shipping rates and payment options, you can improve your store’s conversion rate and reduce cart abandonment.
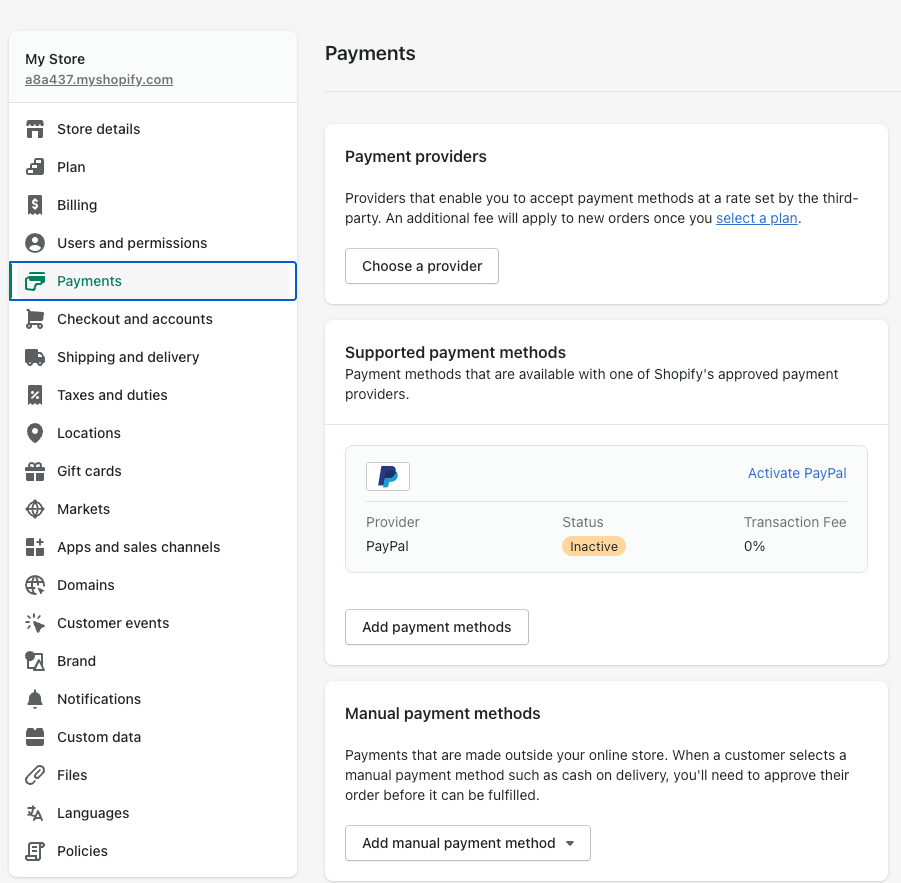
To set up shipping rates, you can set not only domestic shipping but also overseas shipping fees for cross-border ecommerce, so go to “Settings” → “Shipping and delivery” on the management screen, click Shipping profile and fill in the necessary items. Once you’ve also set the information you want your users to see when they order an item, the weight, etc., you’re all set for shipping.
In addition, let’s specify the payment method by going to “Settings” → “Payments”. Shopify supports a variety of payment methods, so choose the one that suits your company and complete all the settings.
Step 6: Subscribe to a Shopify Plan and launch your store

Once you’ve set up your Shopify account, you’ll need to subscribe to a Shopify plan to launch your store.
Login to your Shopify account and click on “Select a Plan” or “Upgrade Your Plan” on your dashboard. Choose the plan that best suits your needs. Shopify offers a variety of plans, including Basic, Shopify, and Advanced, each with different pricing and features. Once you’ve selected your plan, click on “Choose this plan.” Enter your payment information and confirm your subscription.
Once you’ve set up your store, it’s time to launch it. Go to your Shopify dashboard and click on “Online Store,” then “Preferences.” Here you can set your store to “Online,” which will make it live and accessible to customers.
Congratulations, you’ve now launched your Shopify store! Be sure to promote your store using social media, paid advertising, and other marketing channels to attract customers and generate sales.
Step 7: Boost your business with must-have shopify apps
Customizing your site’s functionality with Shopify apps is a great way to add new features and enhance the user experience. Shopify offers a wide range of apps that you can use to add new functionality to your store. In this article, we’ll take a closer look at how to use Shopify apps to customize your site’s functionality.
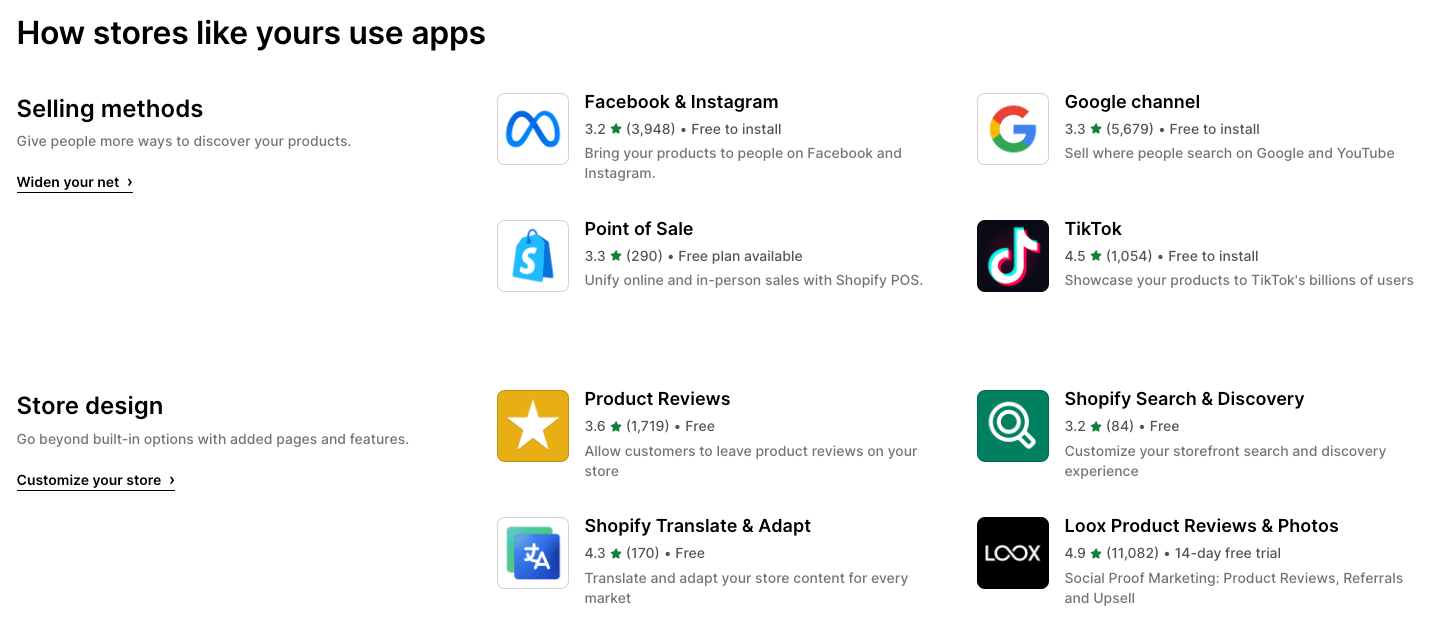
1. Browse the Shopify App Store
The first step is to browse the Shopify App Store and search for apps that meet your needs. The App Store has a wide range of apps, including marketing, sales, shipping, and accounting apps. You can also find apps for social media, email marketing, customer service, and much more. Browse the categories, check out the features and reviews, and select the apps that meet your needs. Shopify Page Builder is one of the apps you should consider to build your online store.
Read more: 40+ Best Shopify Apps to Increase Sales in 2023
2. Install and configure the apps
Once you’ve selected an app, you can install it directly from the App Store. Click on the “Add app” button, and the app will be added to your store. You can then configure the app by following the instructions provided by the developer. Some apps require you to create an account with the developer and connect it to your store.
3. Test and evaluate the apps
After installing and configuring the app, you should test it to ensure it works properly. Check the app’s functionality, look for bugs, and make sure it integrates seamlessly with your store. If you encounter any issues, contact the developer for support.
4. Uninstall or upgrade the apps
If the app doesn’t meet your needs, you can uninstall it from your store. Go to the Apps section of your Shopify dashboard, click on the app you want to uninstall, and then click on the “Delete” button. If you’re happy with the app, consider upgrading to the paid version to unlock additional features.
5. Keep your app collection organized
As you add more apps to your store, it’s essential to keep your app collection organized. Group similar apps together, prioritize essential apps, and remove any apps that are no longer needed. This will help you keep track of your apps and make it easier to manage your store’s functionality.
Step 8: Review your analytics & set up marketing tools
Reviewing your analytics and setting up marketing tools are essential steps to ensure the success of your online store. By analyzing your website’s performance, you can identify areas that need improvement and optimize your marketing efforts to increase sales. In this article, we’ll take a closer look at how to review your analytics and set up marketing tools in Shopify.
1. Review your analytics
The first step is to review your analytics to get a better understanding of how your website is performing. Shopify provides built-in analytics that you can use to track your website’s traffic, conversion rates, and other key metrics. Go to your Shopify dashboard and click on “Analytics” to access your store’s performance metrics.
2. Use marketing tools
Once you’ve reviewed your analytics, you can start using marketing tools to improve your website’s performance. Shopify offers a wide range of marketing tools, including email marketing, social media marketing, and search engine optimization. Here are some of the most popular marketing tools that you can use:
- Email Marketing: Email marketing is an effective way to engage with your customers and increase sales. You can use Shopify’s built-in email marketing tools or integrate with third-party tools like Mailchimp, Klaviyo, or Omnisend.
- Social Media Marketing: Social media marketing is another effective way to drive traffic to your website and increase sales. You can use Shopify’s social media integration tools to connect your store with social media platforms like Facebook, Instagram, and Pinterest.
- Search Engine Optimization: Search engine optimization (SEO) is a critical part of any online marketing strategy. You can use Shopify’s built-in SEO features to optimize your website’s content and structure for search engines.Set Up Advertising Campaigns
Another way to drive traffic to your website and increase sales is through advertising. Shopify offers built-in advertising tools that you can use to create and manage your ad campaigns. You can create ads on Facebook, Instagram, and Google, and track their performance using Shopify’s analytics tools.
- Monitor Your Performance
Finally, it’s essential to monitor your performance regularly to identify areas that need improvement. Review your analytics, track your marketing efforts, and make changes to your marketing strategy as needed. Continuously analyzing and improving your marketing efforts will help you grow your business and increase sales.
In conclusion, reviewing your analytics and setting up marketing tools are essential steps to ensure the success of your online store. By using marketing tools like email marketing, social media marketing, and search engine optimization, and setting up advertising campaigns, you can drive traffic to your website and increase sales. Continuously monitoring your performance and making changes to your marketing strategy will help you grow your business and succeed in the competitive world of e-commerce.
Summary
Shopify is a popular e-commerce platform that enables businesses to set up and run their own online stores. To use Shopify for your online store, you’ll need to follow a few key steps, including signing up for a free trial, selecting a pricing plan, choosing a theme, adding products, setting up payments and shipping, and launching your store.
One of the major advantages of using Shopify is it’s all-in-one solution, which provides a range of features and tools that make it easy to set up and run an online store. Other benefits of Shopify include its ability to handle cross-border e-commerce, its user-friendly interface, and its extensive app store.
However, there are also some potential disadvantages of using Shopify, such as its transaction fees and limited ownership of your online store’s code and data. It’s important to carefully consider these factors when deciding whether Shopify is the right platform for your business.
In summary, here are the steps you need to take to publish your online store on Shopify:
- Set Up a Shopify Account
- Add Products to Your Store
- Choose and Customize Shopify Theme
- Add a Domain
- Set up Shipping Delivery and Payment Methods
- Subscribe to a Shopify Plan and Launch Your Store
- Boost Your Business with Must-Have Shopify Apps
- Review Your Analytics & Set Up Marketing Tools
Overall, Shopify is a robust and flexible platform that offers many benefits for businesses looking to set up and run their own online stores. By following the steps outlined in this guide, you can quickly and easily set up your own online store and start selling products to customers around the world.